Editor quickstart
Learn how to use the ARCHITEXTURES editor to create, customise and export high-quality seamless textures for your projects. This guide covers the fundamentals of the editor’s workflow, from selecting a base pattern to exporting your final texture.
Open the Editor
To begin, navigate to the ARCHITEXTURES editor or click Create in the top navigation bar of the homepage.
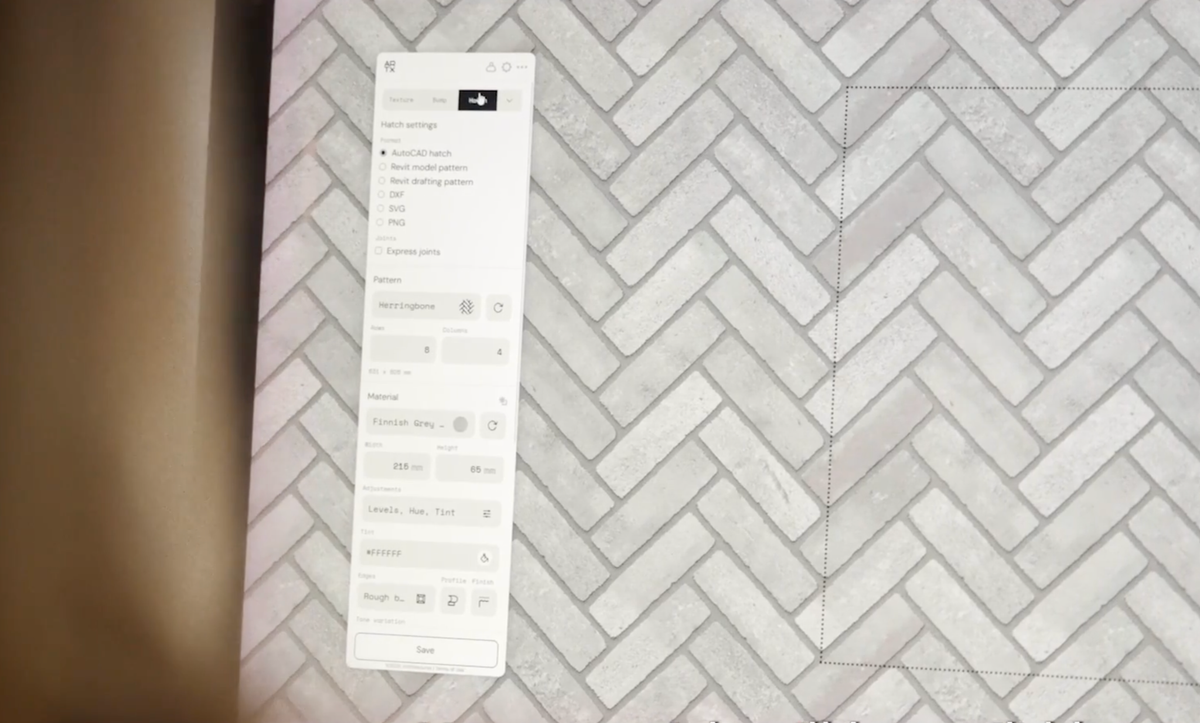
When the editor loads, you will see a default texture in the viewport. The interface is divided into two primary sections:
- The viewport: the central area where you can preview your texture in real-time
- The control panel: the sidebar on the left where you define the geometry and appearance of your material
Define geometry and patterns
Every texture begins with a pattern that defines its structural layout.
- Select a pattern: use the pattern menu to choose a layout (e.g. herringbone, stack or flemish bond). Note that advanced patterns require a Pro account.
- Configure dimensions:
- Rows and columns: adjust these values to increase or decrease the tiling frequency.
- Angle: rotate the pattern within the map
- Total dimensions: view the calculated scale of the texture directly below the row and columns settings
Apply materials
You can choose materials from the ARCHITEXTURES library, or if you are a Pro user, upload your own.
Using the library
Browse the material categories or use the search function to find a specific stone, brick, wood type or any other surface material. After selecting a material, set the width and height to match the scale of each individual tile.
Refining the look
- Retile: click the Retile button to randomly sample different areas of the source image, reducing repetition.
- Colour corrections: use the brightness, contrast, hue and tint sliders to fine-tune the material’s aesthetic to match your project’s colour palette.
Add detail and realism
Use the variation and profile tool to add depth
Tone variation
Use the tone variation slider to introduce shifts in the colour of individual tiles.
Low variation: creates a uniform look
High variation: creates a natural, fuller, more realistic appearance
Edges and joints
Edges: select an edge style and adjust the perimeter scale to simulate bevelled or tumbled edges.
Joints: define the joint material (e.g. mortar or grout) and adjust the horizontal and vertical thickness to change the spacing between tiles.
Surface profiles and finishes
Apply surface profiles to define the 2D texture or 3D PBR (Physically Based Rendering) characteristics. These settings affect how light interacts with the surface. Use the scale slider to align the finish frequency with your material dimensions.
Pro features
ARCHITEXTURES Pro provides advanced workflows such as custom uploads and multi-material blending.
Custom uploads
To use your own image:
- Click Upload at the top of the material menu.
- In the selection tool, click and drag on your image to define the bounds of the material.
- Set the upload width and height in the editor to ensure correct scaling.
Multi-material blending
You can add multiple materials to a single texture by clicking Add another material.
- Placement : use the dropdown to choose how materials are distributed.
- Frequency: use the slider to determine the ratio between the primary and secondary material.
Export and share
Once your texture is complete, you can save it to your collections or download it for use in CAD/BIM software.
Download
- Click Save at the bottom of the editor
- Select Download
- Make adjustments to the download resolution by adjusting width and height
Save and organise
Select Save and As new texture to store the configuration in your ARCHITEXTURES account. You can organise these into collections via your account admin page for easy access across different projects.
Generate a share link
To collaborate or share a configuration
- Click Save > Share link
- Click Get link to generate a unique URL
- Copy the URL to share your live configuration via email or socials
Get creating with ARCHITEXTURES