Pro feature: uploading custom materials
Learn how to import and configure your own source images to create bespoke textures. This feature allows you to extend the ARCHITEXTURES library with proprietary materials.
If you are a Manufacturer wanting to upload your own materials, we have a dedicated account for you. You’ll find all the details by clicking the link below.
Upload an image
To begin, open the material menu in the editor and select upload.
- Select file: a file browser will appear. Select the image file you wish to use. The editor currently supports one file upload at a time.
- Manage the library: to perform bulk uploads or manage your existing custom library, navigate to admin/uploads while logged in to your account.
Define capture areas
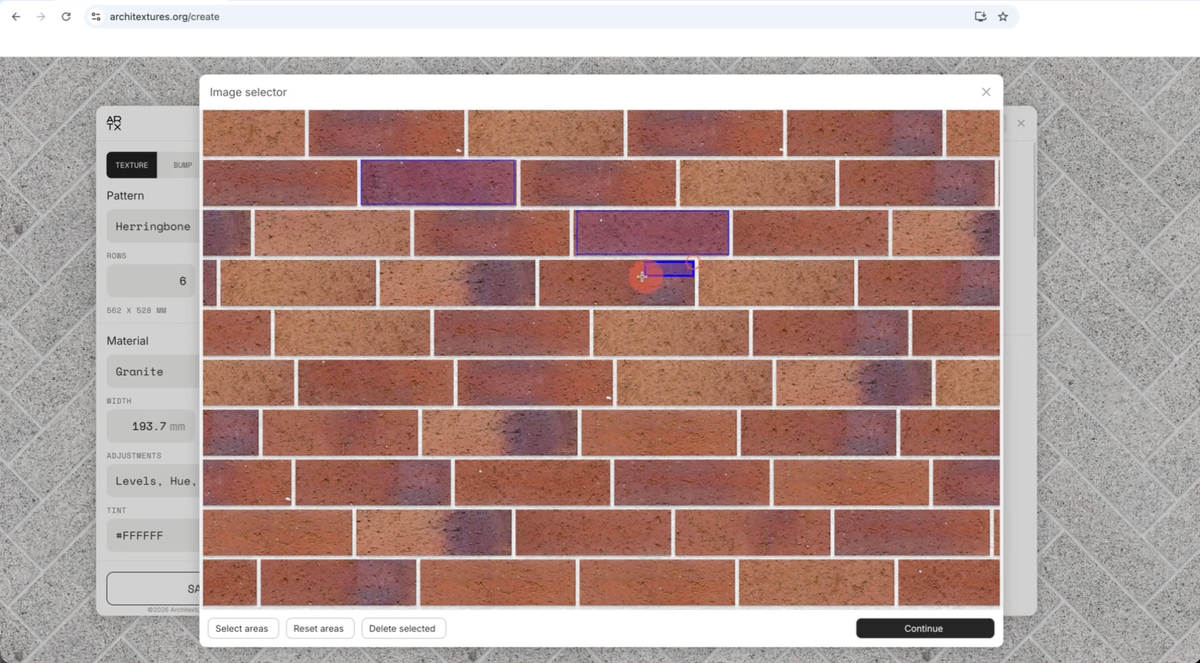
Once your image is selected, the upload editor will launch. This interface allows you to define which parts of the image should be sampled by the engine.
Single crop
If your image represents a single, uniform surface, click Continue to use the entire image as the source.
Multi-area selection (bricks and tiles)
For materials with distinct units, such as a photo of a brick wall or a pallet of tiles, you can sample multiple areas to increase variety and reduce repetition in your final texture.
- Click Select Areas
- Click and drag over the specific bricks or tiles within the image to create individual selection boxes.
- The engine will randomly pull from these selections when generating the pattern.
Configure physical scale
To ensure your material renders at the correct real-world size, you must define its dimensions. When a custom material is active, a unique Upload Width input field appears in the control panel. Enter the physical width of the individual source image (or the width of the sampled areas) to allow the editor to scale the material accurately against your chosen pattern and joint settings.
Technical considerations
Seamlessness
It is important to note that the ARCHITEXTURES engine handles seamlessness through its pattern logic.
With patterns: your uploaded image will appear seamless when applied to a procedural pattern (like herringbone or stack).
Source image: the raw source image file itself is not modified or “wrapped” to be seamless; rather, the editor tiles the sampled areas within the geometric boundaries of the pattern.